Monday, December 12, 2011

Stamp-a-Stack: Christmas Style

Last weekend we got together to make our Stack of Christmas Cards. It was a beautiful morning; sun was streaming in the front window and the ladies were crafty crafty crafty! Check out what they created!

Keep your eyes open for the Birthday Stamp-a-Stack coming soon!


Friday, December 9, 2011

MojoMonday

I FINALLY got around to this week's MojoMonday's sketch challenge! I received my Occassion Mini bundle too and I am IN LOVE with the NEW Pleated Satin ribbon. Isn't it gorgeous??! This new style of ribbon also comes:in:
  • Pear Pizzaz
  • Riding Hood Red
  • Blushing Bride (what I used in my sample)
  • Baja Breeze
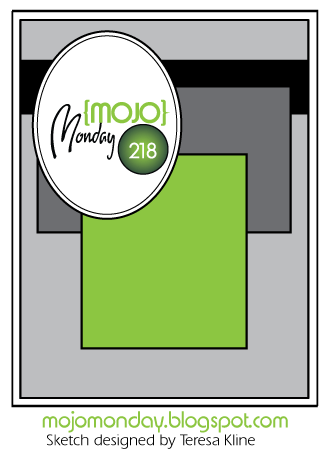
Well, lets get on with it. Here is the sketch:


And here is my take on it. I am one for simple style and that's what you get here with a bit of bling with the Heat Embossed Silver Christmas tree and a bit of flair with the Eyelet border punch.


I really enjoyed putting this card together. The colours used aren't traditional Christmas colours but it's okay to think/create outside of the box :) Give it a whirl!

Ink: Blushing Bride, Basic Gray                                        Paper Stock: Whisper White, Blushing Bride, Twitterpated DSP (NEW - available Jan 4!)                        Stamp Set: Snow Swirled, Tags Til Christmas                             Accessories: Blushing Bride Pleated Satin Ribbon (NEW! available Jan 4), Sterling Silver Embossing Powder Tools: Decorative Label Punch, 1 3/4" x 7/8" Oval Punch, Eyelet Border Punch, Heat Tool, Versamark, Dimensionals, Sponge

Why don't you try coming up with your own design to this sketch and load it up on the MojoMonday website for all to see :)

Create to bless!

Tuesday, December 6, 2011

One-Day Contest!

You ladies have been WONDERFUL in support of my love of card-making. I'm reaching out for your help...

Today I'm in a contest to get as many bookings as I can between January 24 and March 31. AND I hope you'll be one of the people that will take advantage of the amazing special going on!


What's the "amazing special?" you ask? Sale-A-Bration!!


Have you heard about this amazing promotion? In my opinion, it's the best one of the year!


Between January 24 and March 31, for every $60 you spend (before shipping & taxes), you get to choose one product FREE from the
exclusive Sale-a-Bration catalogue! What a deal!


Not only do you get to choose a FREE product, you also receive additional hostess benefits! It could include:
  • a FREE tote bag
  • more FREE Stampin' Up product
  • items at 50% off
  • ...and more!
I'm scheduling my stamp parties now! Don't delay to book your party! As a HUGE Thank You, anyone who contacts me today to book a party will receive 3 hand stamped cards made by me. They will be presented to you at your party!!


Can't wait to share what I love with you & your friends! Contact me by end of day today!

Monday, December 5, 2011

'Tis the season to shop at home and SAVE!

Don't want that dud gift again this year? Let your friends and family know about your WISHLIST & you'll be sure to get the PERFECT GIFT this year!

Go to store: http://www.stampinup.net/esuite/home/stampingwithrach/ to check out the products! 

In order to receive your gift(s) by Christmas, your order needs to be provided to me by Dec. 8th.

HAPPY SHOPPING!

Saturday, December 3, 2011

Gift Certificates are Available!

Having a hard time figuring out what to get for that certain someone on your list? Look no further...

A gift certificate - of any amount - is an excellent option. Let your significant other know too - make Christmas shopping easy for them this year :)


Or consider this as an option for a stocking stuffer!

You will receive this cute little package inside a high quality Stampin' Up hand-stamped envelope.

Contact me today to order your gift certificate!
Thanks and happy shopping!

Saturday, November 26, 2011

Online Extravaganza!


Only a few more days of ONLINE EXTRAVAGANZA! Get select online products up to 60% off until November 30th!

Don't miss out!

Click here to see all the Stampin' Up goodness you can own.

Saturday, November 5, 2011

Christmas Stamp-a-Stack: NEW DATE!

Hello Crafty Ladies!


Just wanted to let you know that the date for this event is now DECEMBER 3rd! Below are the details...


When: December 3rd, 9am - noon
Where: my place
What: make 12 cards (3 each of 4 designs)
Cost: $40
RSVP: click here by November 7 to register
MISC: there will be a tasty & warm lunch ready and waiting for you :)


Here's the line-up!

CASE'd from Robin Merriman
CASE'd from Wendy Todd
CASE'd from Donna Schafer

Inspired by Penny Ginnery

Hope to see there! FA LA LA LA!

Saturday, October 15, 2011

Christmas Stamp-a-Stack!

The moment you've all been waiting for has finally arrived.... A date to set aside on your calendar for the Christmas Stamp-a-Stack!


Mark off November 19 from 9am - noon. I will have a warm and hearty lunch available for those who want to stay afterwards.


We will have a great morning making 4 different cards; a qty of 3 each for a total of 12 cards for only $40! Here's a sneak peek at one of them.


CASE'd from Penny Ginnery
Adorable, don't you think?


There is only room for 12 of you so RSVP early by clicking here. Feel free to bring a friend too!    Fa la la la la!

Friday, September 9, 2011

September Make n Take

Another Make n Take night came and went and were we busy little bees making these beauties:


I can't believe we are already making Christmas cards!


Joy at Christmas
Card Stock: Whisper White, Bashful Blue
Ink: Bashful Blue, Rose Red
Stamp Set: Perfect Punches
Tools: Big Shot, Northern Flurry Embossing Folder, 1 3/4" Scallop Punch, 3/4" circle punch, dimensionals, sticky strip
Accessories: 5/8" Organza Whisper White ribbon


Tips & Tricks:
  • to get the ruffled ribbon look, put stick strip across your card stock. Start on the left end and fold over the ribbon. To ensure the ruffles stay down as shown, put a small bit of adhesive under the ruffle and push down
  • one of the girls at the Make n Take put a rhinestone jewel in the center of the embossed snow flakes. It was an excellent touch and certainly sparkled up the card!

                                                              Happiest Birthday Wishes!

CASE'd by Julie Davison
Card Stock: Calypso Coral, Basic Black
Ink: Basic Black
Stamp Set: Happiest Birthday Wishes (Hostess Set)
Tools: Lace Ribbon Border Punch (NEW!!), 3/4" circle punch
Accessories: Basic Pearls


I love how simple this card is yet it makes such an impact. Loving these colours together!

Happy Thanksgiving
CASE'd by Julie Davison

Card Stock: Soft Suede, River Rock, Very Vanilla, Spice Cake DSP (in NEW Holiday Mini)


Ink: Early Espresso, Pear Pizzaz


Stamp Set: Gently Falling, Teeny Tiny Wishes


Tools: Dimensionals

This card could be used as a masculine birthday card too!


                                                              Christmas Cheer


Card Stock: Real Red, Chocolate Chip, Whisper White
Ink: Chocolate Chip, Old Olive marker, Real Red marker, Tempting Turquoise marker, Daffodil Delight marker
Stamp Set: Polar Party
Tools: Big Shot, Polka Dot embossing folder, 2 1/2" Circle punch, Modern Label Punch, dimensionals
Accessories: Cherry Cobbler/White Baker's Twine, Real Red Polka Dot ribbon (retired)


August Technique Night!

Sorry for the delay on this.... Unpacking and settling back in to normal life after a 3-week trip camping and then seeing my oldest off to grade 1 (already!!?!) saw my blog posts be put on the back burner.


Waaay back in August [:)], our Technique Club tried out the Faux Silk technique. It is such a beautiful technique! Here's how you do it:


1. Take one layer of tissue paper and stamp
2. While that's drying, apply Anywhere Glue Stick to your card stock
3. Wait about 5 minutes to allow the ink to dry
4. Crumple the tissue and gently open it back up again
5. Adhere to your card stock that you applied glue to
6. You can flatten out as much as you'd like but ensure you leave some wrinkles to ensure you are seeing the Faux Silk effect


For a softer look, follow the steps above but instead of inking the tissue paper, ink your card stock. Before you apply Anywhere Glue Stick, ensure the ink is dry. Wait about 5 minutes.


Check out the cards we worked on....


Praying for You:
CASE'd from Stamping with Brenda
Card Stock: Whisper White, Melon Mambo
Ink: Old Olive, Melon Mambo
Stamp Set: Thoughts & Prayers
Tools: Scallop Oval Punch, Extra Large Oval Punch, dimensionals, tissue paper, Anywhere Glue Stick
Accessories:  5/8" Organza Whisper White ribbon


Tips & Tricks:

  • When inking the tissue, wait a good 5 minutes to let it dry and then blow on it for good measure

                                                                              Just For You
Inspired by My Little Patch of Dirt
Card Stock: Pacific Point, Whisper White, Beyond the Garden DSP
Ink: Wild Wasabi, Pacific Point
Stamp Set: Fabulous Florets, HodgePodge Happiness
Tools: Big Shot, Elegant Lines Embossing Folder, Tissue paper, Word Window Punch, Modern Label Punch

Tips & Tricks:
1. After you adhere your tissue paper to your paper stock, use your snips to trim the excess


       Believe
Inspired by many cards online searching Faux Silk
Card Stock: Rich Razzelberry, Marina Mist, Wild Wasabi, Whisper White
Ink: Wild Wasabi, Rich Razzleberry marker
Stamp Set: Just Believe
Tools: Scallop Border Punch, Tissue Paper

Tips & Tricks:
  • To make sure you center your phrase, put a small dot on your cardstock where you want the middle of your sentiment to be. That will help you line it up 

What do you think?? I'd love to hear your comments.

So much fun! Do you want to join the Techniques Club? Contact me for details!